Weekly Recap: Titled Luxe Prints, Zoom Cropping, and Candy Image Studio “From Scratch”
.png)
Hey photo friends! 👋
This week’s updates are a fun mix of new products, new visual workflows, and small-but-important fixes that make day-to-day work smoother—especially across Candy Image Studio, retail packages, and PhotoRoster/PhotoTag downloads.
Let’s jump in. ✨
📣 Dashboard: Client Outreach + Workflow Quality-of-Life
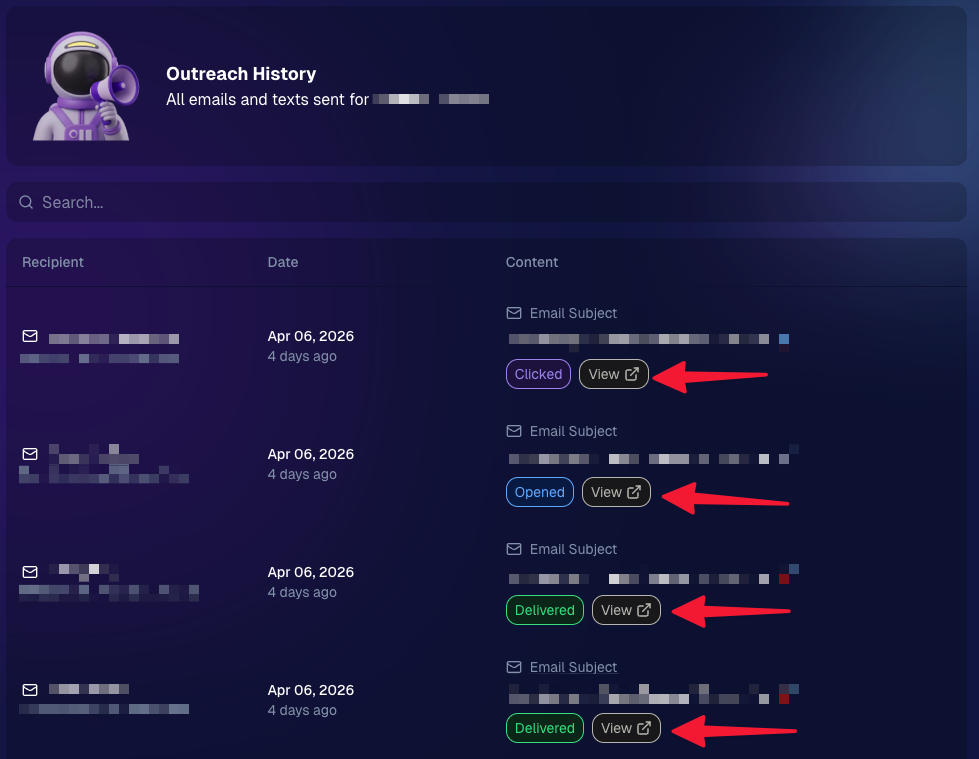
Client Outreach email history is easier to use and more reliable:
- Added a “View” button in Client Outreach email history so you can open the sent email in a new tab (similar to how order receipts work).
- Fixed an issue where email status didn’t always show for all emails in the status list.
More clarity when reviewing participant galleries:
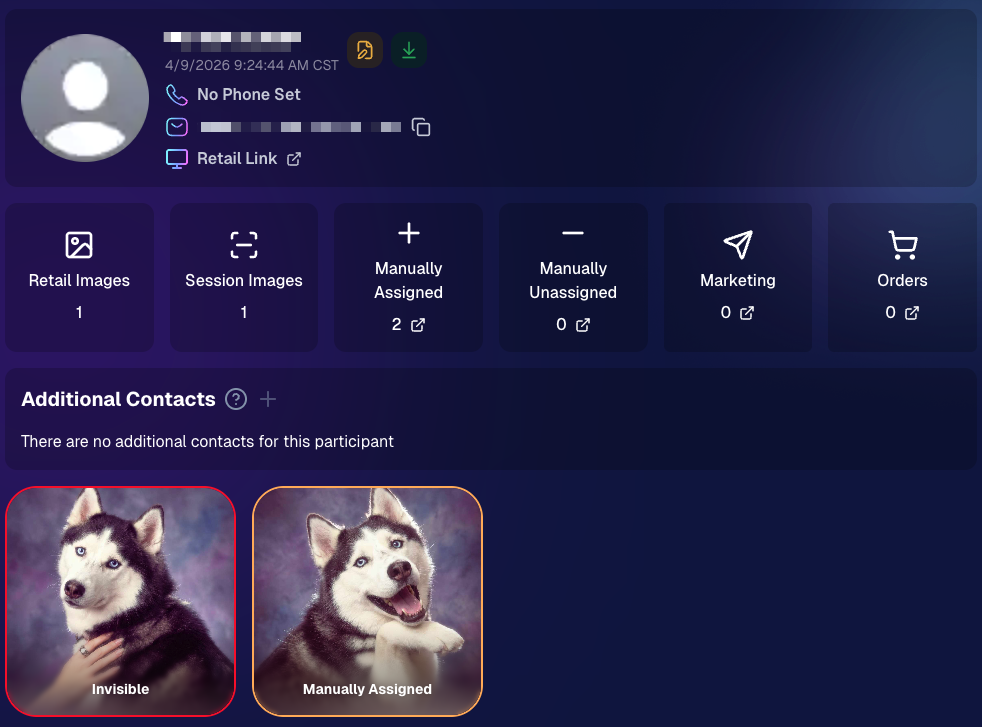
- The Participant Details page now shows invisible images, clearly marked in red with an “Invisible” label—so you can understand what’s hidden without guessing.
PhotoTag participant gallery downloads got safer:
- Fixed PhotoTag participant gallery downloads overwriting images when multiple files shared the same frame.
- Fixed the download count displayed on the download button being off.
🎨 Candy Image Studio: Create Without an Input + A New Node
Candy Image Studio has two notable upgrades this week:
🧠 No input image required (generate from scratch!)
Candy Image Studio no longer requires an input image to get started. You can generate from scratch using the “From Scratch” node (at the very bottom), or by starting from custom text or a custom image—great for things like creating portrait backgrounds or creative assets.

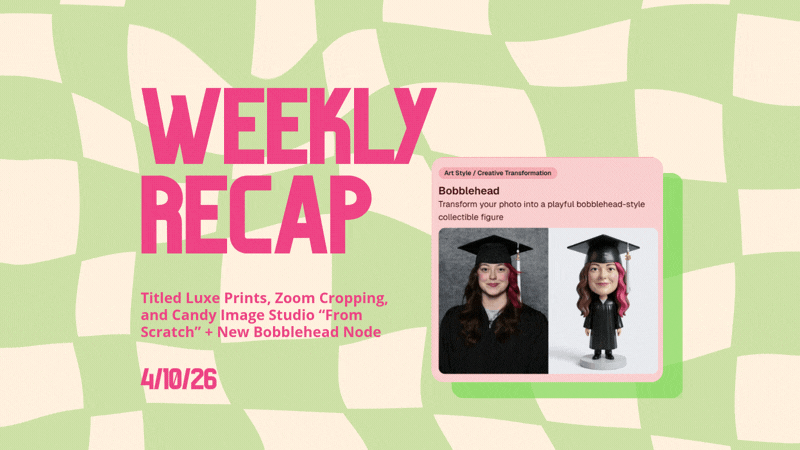
🆕 New “Bobblehead” node
A brand-new Bobblehead node is now available inside Candy Image Studio.

🏈 Jersey Jotter + Event Settings Cleanup
Jersey Jotter settings were removed from the Create/Edit Event popup.
Since Jersey Jotter now has its own dedicated page, we pulled those settings out of the event popups to keep Create Event as minimal (and fast) as possible—and keep Edit Event aligned with Create.
New: “Auto Enhance” can be turned off in Create/Edit Event.
Important clarity here:
- Auto Enhance isn’t new — it has always been enabled by default.
- What’s new is the ability to turn it off from the Create/Edit Event popup.
- It’s labeled “Auto Enhance” (not “Retail Enhancement”) because it affects more than retail, including things like LiveLoop, Dashboard previews, Shareable Download Gallery, and more.
- Note: this setting only impacts images uploaded after you change it. (So anything already uploaded keeps whatever enhancement state it had at upload time.)
🛍️ Retail: Package Backgrounds + Fixes
A few retail improvements landed to reduce confusing edge cases:
- When selecting a PNG (without a faux background render) during the “Next Package Item Image Picker” step, the chosen background will now default to the first background in the background picker list (instead of the purple default).
- Fixed an issue where the background selector step didn’t always appear for non-faux BGR images.
- Fixed a crash related to having Wall Clings in packages.
- Updated the Free Download description to: “Free simple, full-resolution download of your image.” (Previously it implied lower resolution.)
🔍 NEW: Zoom Cropping “Z-Cropping” (Dashboard + Retail)
In Advanced Offer Settings, you can now enable Zoom Cropping, which automatically adds an additional image into the customer’s gallery that is zoom-cropped toward their face.
Details & rules:
- ✅ Works on Face Matching Events
- ✅ Works only on images with one face
- ✅ All default graduation offers/price levels now have Zoom Cropping enabled
- Behind the scenes, it applies a ~30% zoom toward the face, with an additional ~30% pull from the center of the image toward the face (clamped to avoid cropping beyond image bounds)
This is a great “quiet upgrade” for grads and portrait-style moments where customers love a tighter crop—without you needing to manually create it.
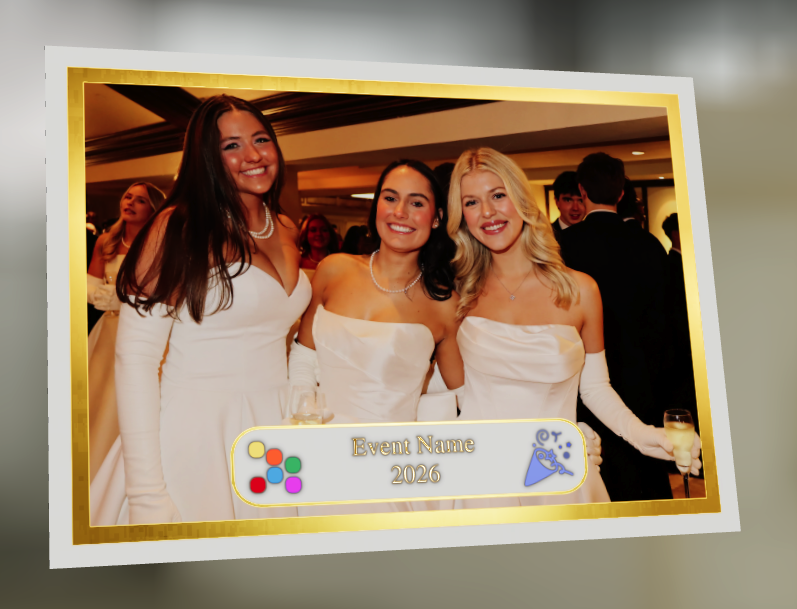
🖼️ New Products: Titled Luxe Prints (Dashboard + Retail)
Two new products just landed:
- 5×7 Titled Luxe Print
- 8×10 Titled Luxe Print
Want to see the 3D preview?https://app.nowcandid.com/3d/titled-luxe-print
New: “Edit Titled Luxe Print” Page (per event)
There’s a new event-level page available in the Dashboard sidebar only if one of the new titled products is included in the event’s offer. From there, you can:
- Set default captions
- Select left/right logos
- Preview the 3D render
- (Easter egg: rotate the render and you can spot your business name on the backprinting.)
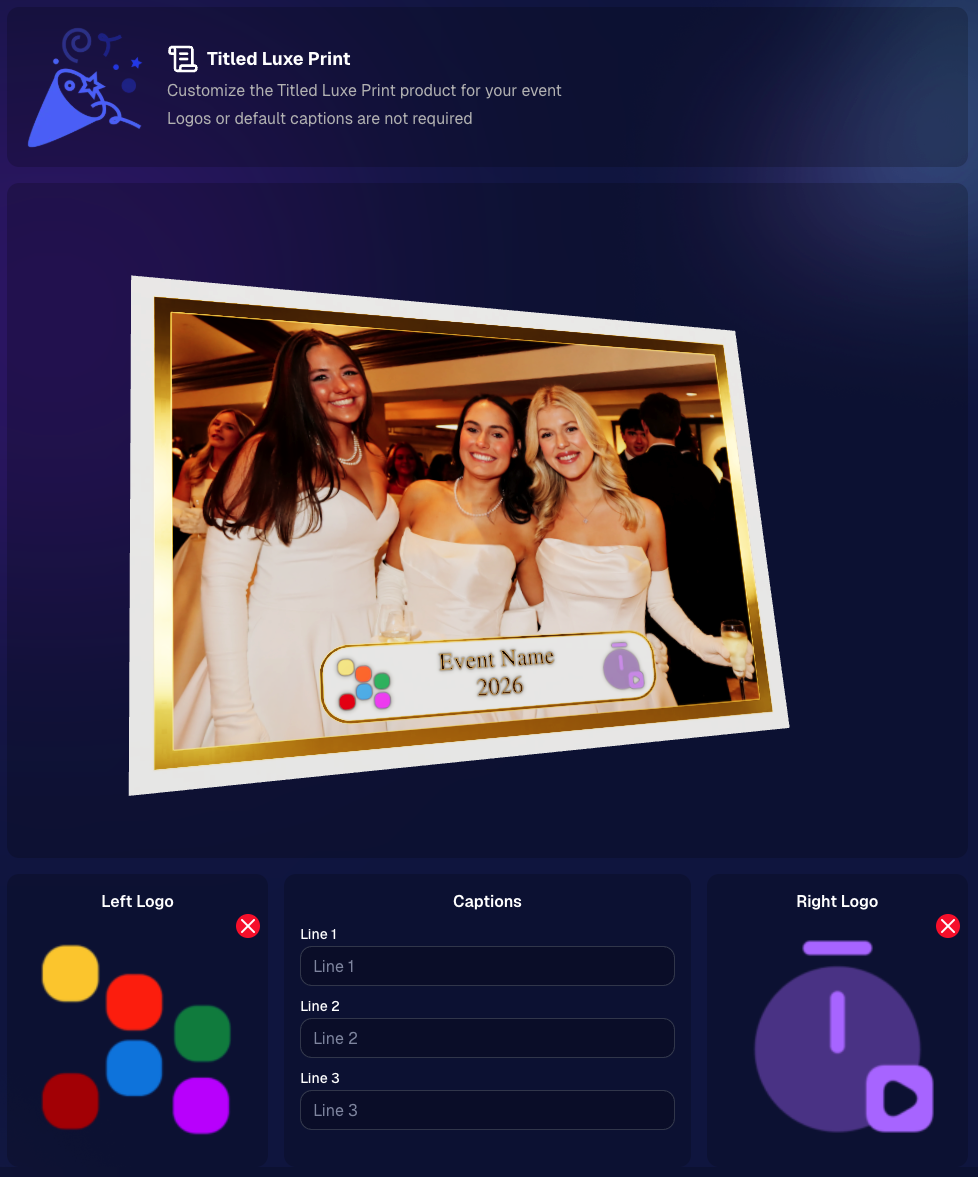
Notes:
- Default captions and logos are optional
- Retail shoppers can change captions when ordering
- Logo requirements: upload/import a 650×650 transparent PNG
- Retail supports both 2D + 3D renders, including your custom logos
- Order Details pages now display the selected logos, similar to how we show captions and colors
That’s the week! 💫
Between Zoom Cropping, Titled Luxe Prints, and Candy Image Studio’s new From Scratch flow (plus a pile of cleanup across retail + downloads), this update adds a lot of power without adding extra complexity.
Keep creating magic,
— Candy 🍬
.png)

.jpg)

.svg)


