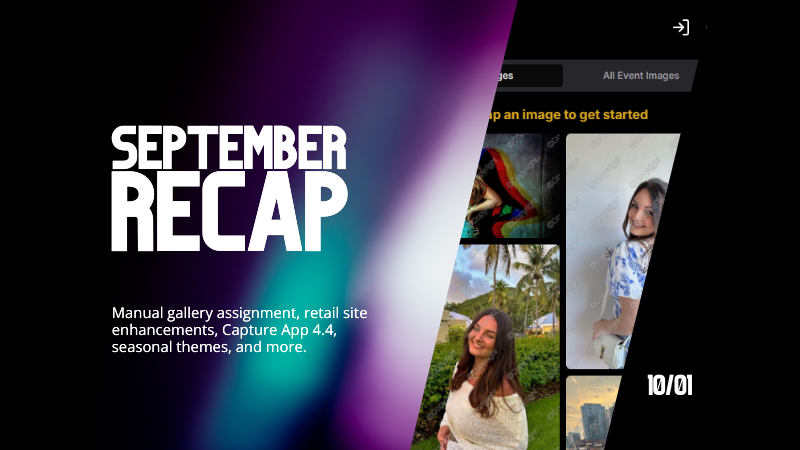
Candy's September Recap: New Features from Last Month!📸🎉
.png)
Hello, wonderful photographers!
Candy here, bringing you the first edition of our Recap series! 🌟
This blog post will cover alllllll of September's new features and changes worth mentioning! But going forward, we will be doing Weekly Recaps to keep you in the loop even faster.
We've been busy bees these past few weeks, and I can't wait to share all the fantastic new features and improvements we've made to help you shine even brighter. ✨
Psst... since this is our inaugural recap, we're covering updates from all of September, so grab a comfy seat—it's a bit longer than usual! Going forward, these recaps will be weekly and shorter, but just as sweet. 😉
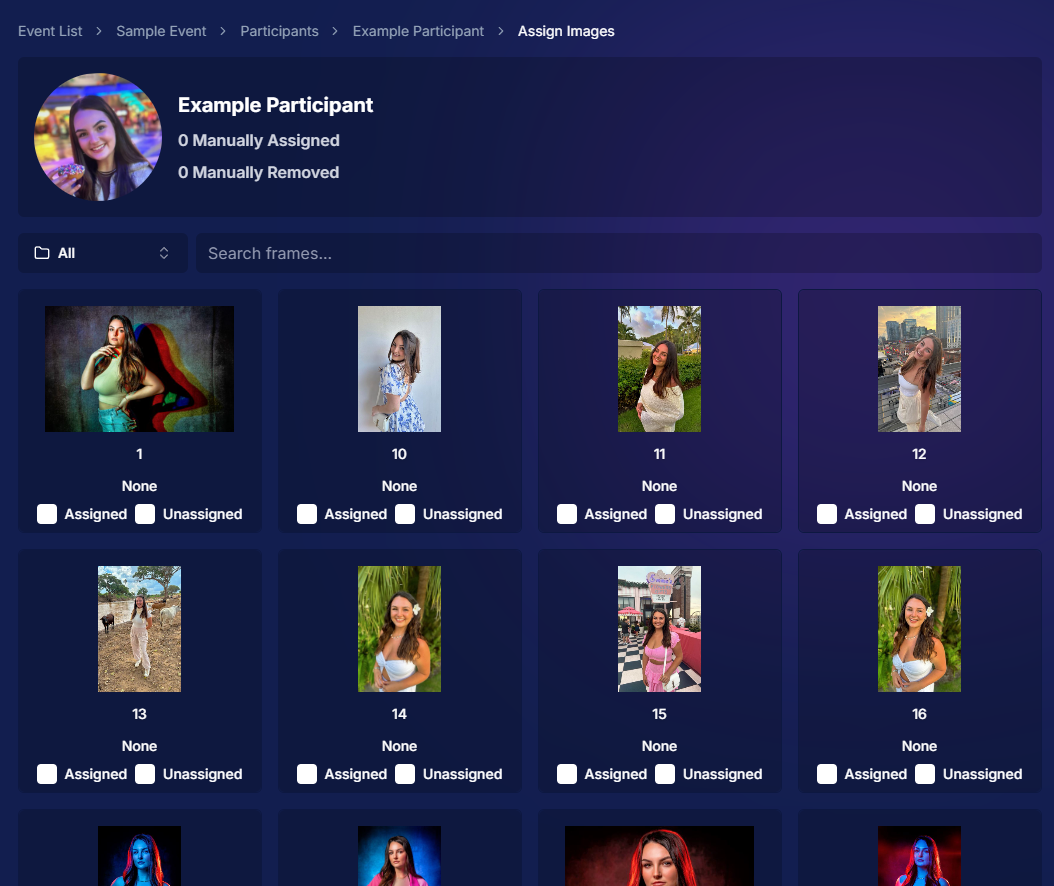
1. Manual Gallery Assignment & Participant Creation 🛠️
We're thrilled to announce that manual gallery assignment and participant creation are now live! This means you can:
- ○ Assign images to someone's personal gallery manually—perfect for those shots where the subject wasn't facing the camera, and face recognition didn't pick them up.
- ○ Create participants manually, either one at a time or by uploading a spreadsheet.
- ○ Instantly trigger marketing campaigns to individuals when you assign images to them, ensuring they receive their photos promptly.
We believe this will greatly enhance your workflow and support needs. Let us know how it helps you during your next event!
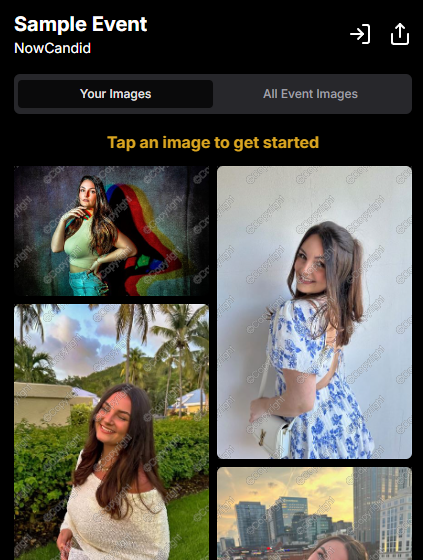
2. Tweaks to the Retail Site for a Smoother Experience 🛍️
We've made several improvements to our retail site to enhance the shopping experience for your clients:
- ○ "Tap image to get started" text now shimmers on the initial gallery screen to guide users who aren't sure what to do next.
- ○ Package creation improvements make it more intuitive for customers to customize their packages and select photos.
- ○ Product renders in the cart: The view cart screen now displays product images next to every item, including items within multi-item packages, for increased clarity.
- ○ Updated header and footer: Clear guidance on when to contact our retail support or reach out to you, the photographer, for assistance.
These tweaks aim to make the purchasing process as seamless and enjoyable as possible for your clients!
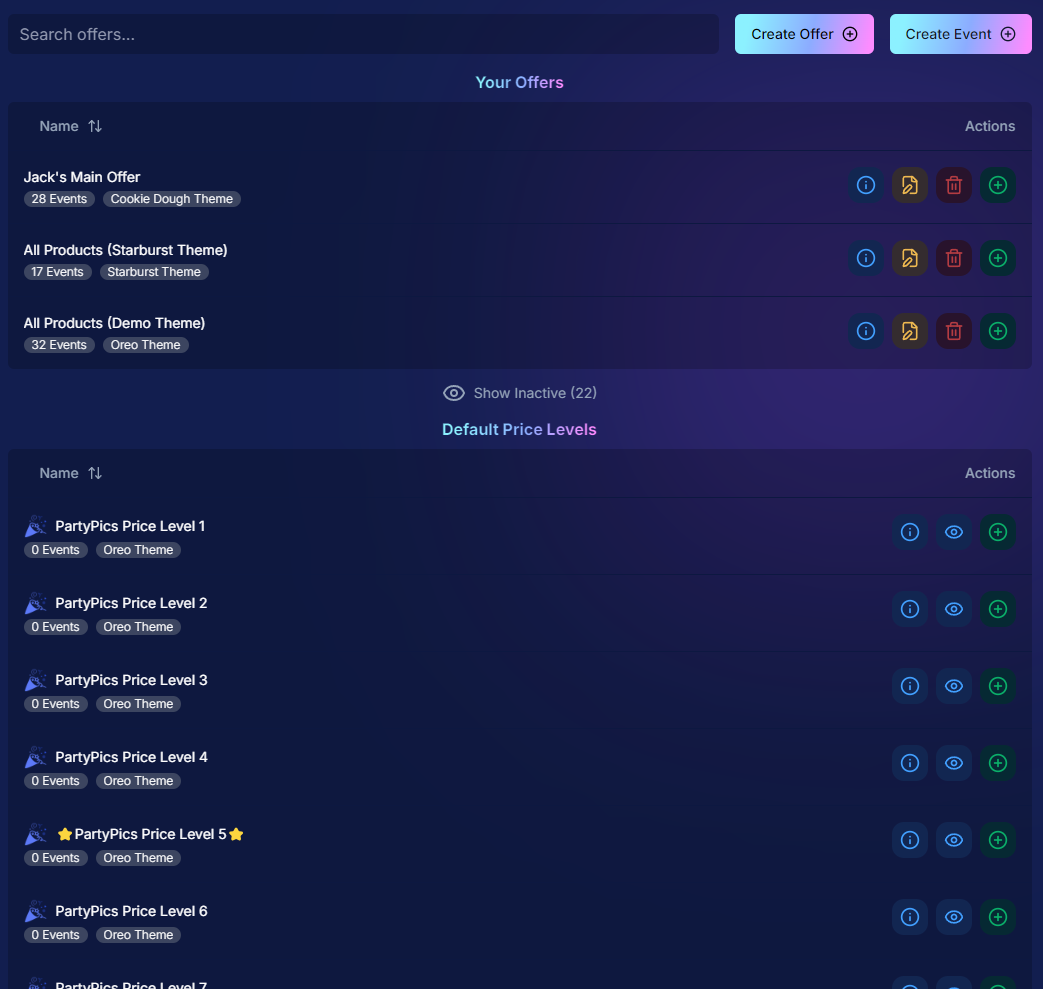
3. Default Price Levels Are Back! 💰
Great news! The Default Price Levels from our previous NowCandid system are back and better than ever.
While you can still create custom offers, these ready-made Price Levels are optimized to help you maximize sales in various situations.
- ○ Optimized for success: Designed to boost your sales potential.
- ○ Versatile options: Suitable for a wide range of events and client needs.
- ○ Easy to access: Gives you good Offer options in a pinch or when entering a new market.
For a detailed breakdown, click here.
4. New Image Notifications for Previous Purchasers 🛎️
We've improved our marketing system to better serve your clients and help keep those sales up:
- ○ If someone purchases on Day 1 and is photographed again on Day 2, they will now receive a notification about the new images added to their gallery.
- ○ Enhances customer engagement: Keeps clients informed and encourages additional purchases.
- ○ Prevents missed opportunities: Even early buyers stay in the loop for new content.
This ensures your clients never miss out on their special moments!
.png)
5. Google Pay Added to Express Checkout Options 💳
We're excited to introduce Google Pay as a new express checkout option!
Our available payment methods now include:
- ○ Traditional credit/debit card checkout
- ○ Apple Pay
- ○ Google Pay
- ○ PayPal (and PayPal Pay Later)
- ○ Venmo
And guess what? We have one more express checkout option coming soon! Stay tuned. 📢
.png)
6. Capture App Version 4.4 for iOS & Windows 📱💻
The latest Capture App Version 4.4 is now available for both iOS and Windows, featuring:
- ○ Keyboard support for Windows: Windows laptop users can now input phone numbers using the keyboard when using the Tap-A-Face Workflow.
- ○ Performance improvements: Smoother and faster app experience.
- ○ sRGB color checking: The app now ensures images are in sRGB format, preventing issues caused by Adobe RGB images.
- ○ Event Selfie Check-In QR code display: Access the QR code directly from your device when needed.
Upgrade now to enjoy these enhancements!
.png)
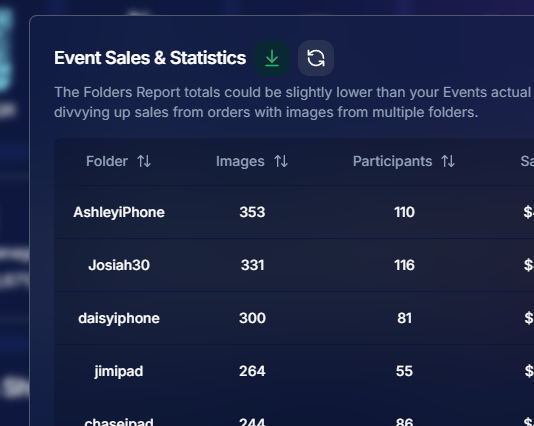
7. Enhanced Folders Report 📊
Our Folders Report (which you can find using the Graph button on an Event's Management Page) just got more powerful:
- ○ Sortable columns: Organize by images, participants, sales, and more.
- ○ Real-time insights: Works live during events, allowing you to identify your best-performing photographers, mid-event.
- ○ Actionable data: Mid-event reporting helps you provide immediate feedback to your team to boost performance.
- ○ Download button: This report is now downloadable via the green button in the screenshot below as well!
Optimize your event management like never before!
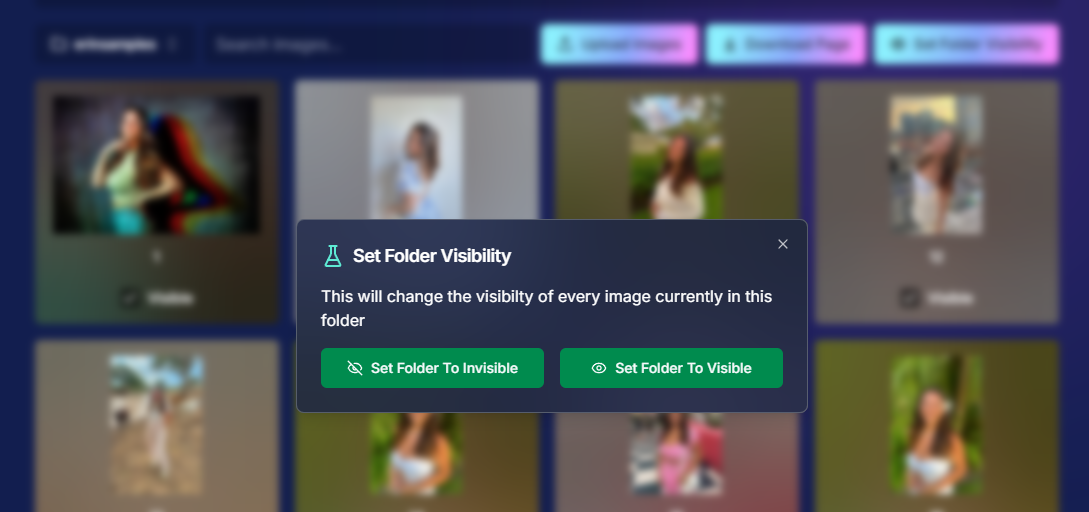
8. Bulk Visibility Control for Image Folders 📁
We've added a handy button in the Manage Images page, when you have a folder selected:
- ○ Mark entire folders as visible or invisible with one click.
- ○ Use cases: Quickly hide a batch of images that need reworking, such as a blurry set.
- ○ Saves time: Streamlines the process of managing large numbers of images.
Sometimes, mistakes happen! Now you can use this button to quickly hide images in bulk as you work to correct issues.
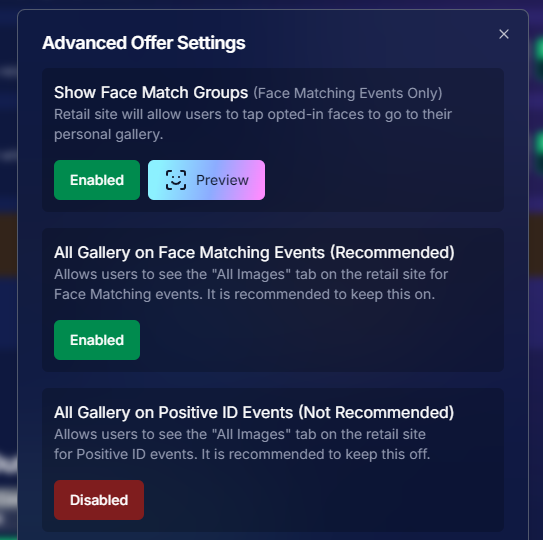
9. Customize "All Event Images" Gallery Settings 🖼️
You now have more control over the All Event Images gallery:
- ○ Override default settings at the Offer level.
- ○ Options:
- Turn off the All Event Images gallery for Face Matching Events.
- Turn on the All Event Images gallery for Positive ID Events.
- Turn off the All Event Images gallery for Face Matching Events.
- ○ Recommendation: We suggest sticking with the defaults, but if you'd like to explore the pros and cons, click here to schedule a chat with us!
Tailor the gallery experience to suit any event's needs!
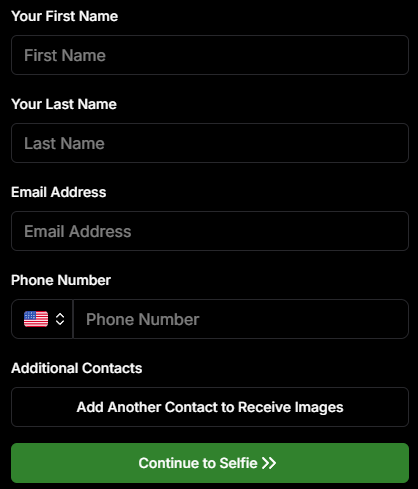
10. Simplified Selfie Check-In 📲
We've made the Selfie Check-In process even more user-friendly:
- ○ Only requires a cell number OR email address.
- ○ Encourages participation: Even though neither field says "optional," most people still provide both.
- ○ Addresses Fringe Issues: Every now and then, someone doesn't have (or refuses to provide) a cell or email address. This change will account for those individuals!
Enhances guest engagement and reduces fringe support issues, with no changes on your part!
11. New Unsubscribe Keyword: "NOPE"! 🚫
We've introduced a new, fun way for clients to manage their marketing preferences:
- "NOPE": Clients can reply with this word to opt out of marketing for a specific event.
- Future communications: They will still receive messages for future events unless they opt out again.
- Accidental "STOP" replies: If someone replies "STOP" though, they'll need to send "START" to our marketing number to resume receiving texts.
This gives your clients more control while still keeping communication lines open for future events.
.png)
12. Seasonal Retail Themes: Apple Crumble & Candy Corn 🍂🎃
Get into the festive spirit with our new retail site themes:
- Apple Crumble:
- Autumn colors: Warm and inviting hues.
- Falling leaves: Adorable "leaves falling" animation upon gallery arrival, check-in completion, and after checkout.
- Autumn colors: Warm and inviting hues.
- Candy Corn:
- Halloween vibes: Shades of black and bright orange.
- Candy corn confetti: Fun "candy corn toss" animation to celebrate the spooky season upon gallery arrival, check-in completion, and after checkout.
- Haunted Retail Site: A few ghosts frequently fly across your customer's screens as they shop!
- Halloween vibes: Shades of black and bright orange.
Delight your clients with these charming themes!
Note: the Leaves & Candy Corn only fall across the screen upon gallery arrival, check-in completion, and after checkout - these GIFs are simply showing it in a loop :)
.gif)
.gif)
We hope these updates make your experience with NowCandid even more enjoyable and efficient.
Your success is our top priority, and we're always here to support you. 💖
As always, if you have any questions or feedback, don't hesitate to reach out. We're all ears! 👂
Until next week, keep capturing those amazing moments!
Cheers and sparkles,
Candy 🍬


.svg)


