HomeNavigation arrowBlogNavigation arrow
Current page
Feature Updates

Big News: PhotoTags for Participants 🏷️👤

Big News: PhotoTags for Participants 🏷️👤
Hey there, photo friends!

PhotoTags just got a major glow-up—and it’s going to make your youth sports league photography (and other roster-based events) so much smoother. ✨

You probably already know PhotoTags as a way to organize images from an Event into public image groups—perfect for team photos, tournament games, or multi-day event galleries.

But now? PhotoTags can also be assigned to Contacts. Let’s break down what’s new and how it all works together.

📋 Assign PhotoTags in Your Rosters

When uploading a roster to a Name Lookup Event in the Web Dashboard, you can now include PhotoTag columns in your spreadsheet.

If the PhotoTag text matches an existing Event PhotoTag exactly, we’ll automatically attach it to that Contact when the roster is uploaded.

👀 View & Edit PhotoTags for Contacts

On the Participant Details page, you can now:

  • • See all PhotoTags assigned to that Contact
  • • Assign or unassign additional PhotoTags
  • • Rename PhotoTags without breaking existing links (the updates will flow everywhere!)

🖨️ PhotoTags on Scan Cards

Using the Scanner ID Workflow? Your downloaded Scan Cards now display any assigned PhotoTags—making it super easy to match the right cards to the right team. ⚽🏀🏈

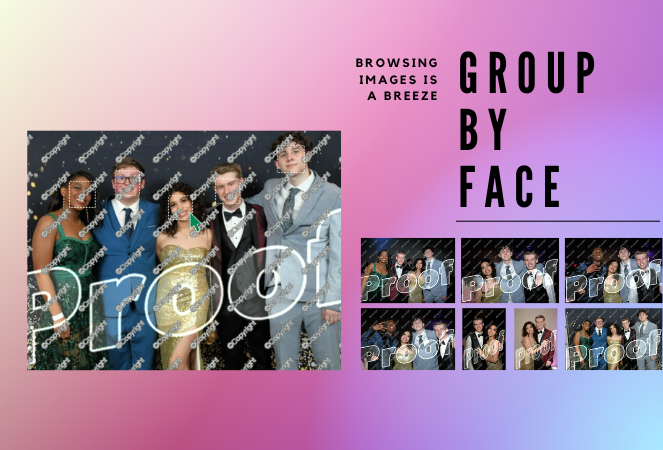
🖼️ Group Photos in Galleries

If Group Photos are attached to a PhotoTag, they’ll automatically appear at the end of every personal gallery for subjects with that same PhotoTag. (Non-group images assigned to a PhotoTag won’t auto-appear in personal galleries.)

📱 Sort Name Lookup by PhotoTag (Capture & Upload App v4.20.1)

This one’s a game-changer for on-site shooting:

You can now filter Name Lookup by PhotoTag—so if you’re photographing the “Panthers” next, just filter and only Panthers will appear.

We’ve also polished the Name Lookup interface to make it faster and easier to navigate. You’re welcome. 😉

That’s the scoop on PhotoTags for Participants! 🏷️💪

Together, these changes mean:

  • • Faster on-site team photography
  • • Better organization from roster upload to final gallery
  • • Cleaner communication with coaches, parents, and teams
  • • Happier clients (and fewer mix-ups!)

Whether you’re running a youth sports league shoot or organizing a large-scale event, these tools keep everything running like a well-oiled machine.

Keep tagging like a pro,

Candy 🍬

Related articles

How One Night Led to $15,000 in Social Photography Sales
Success Stories
December 12, 2022

How One Night Led to $15,000 in Social Photography Sales

9
 minutes read

Amy Lombardo, and her photography group recently sent several photographers to a military ball and at the time of writing this article, had over $15,000 in sales! To accomplish this, Amy used Now Candid’s Party Pics Now program & Tap A Face workflow with 4 photographers at the event. Several of these photographers worked photo stations with backdrops Amy provided (gray backgrounds with flags bordering the background) while other photographers roamed the party taking posed photos of the guests.

$15,000 is a lot of sales for one social event already, but it is especially impressive when you consider the fact that this was Amy’s first Now Candid event.

Amy Lombardo had this advice for those considering using Now Candid for their next event: “Keep it simple and trust the process. … When planning my first Now Candid event, I was advised to not overcomplicate things and to not get hung up on some of the more minor details. Following through with how the system is intended to work turned out very well for us!”

Thanks for trusting the process Amy! We wish you many successful events to come. To see Amy’s entire video testimonial, click the play button below.

Scanner Identification Now Available in Our Microsoft Store App
Feature Updates
December 1, 2022

Scanner Identification Now Available in Our Microsoft Store App

7
 minutes read

We have a new update now available for the Now Candid Microsoft Store App! This update has several quality of life changes and logging improvements, but the main change is that Scanner Identification has finally been implemented!


Scanner Identification is a system that positively IDs images to your customers using, as the name implies, a scanner to scan a customer’s QR card.


When setting up your event you can generate these QR cards (more on that later) that your customers can scan with their phone to input their contact information. From there, the info & QR code are linked. Any time a QR code is scanned by the photographer that starts a session, and all subsequent photos taken will be matched to that contact info until another QR code is scanned.


At this time, Scanner Identification will only be usable with Sports Pics Now and Portraits Now. During event creation, when one of those two programs have been selected, you’ll choose either the “Tap A Face & Selfie Registration” option, or the “Scanner Identification” option. Once Scanner Identification has been selected and the event created, you’ll be able to input how many QR cards you need and a PDF will be generated with that many cards.


You’ll want to print out the PDF on perforated paper such as this 4 up card paper found on Amazon to more easily distribute cards without manually cutting all the paper.


The Scanner Identification workflow does require an LTE tablet! It’s required both as a device to connect your scanner to and as a way to upload your images live at the event so that guests can have links to buy their images moments after their session ends! Since facial recognition is not being used, galleries will be sent even more quickly and with 100% of the images taken during the session.


If you happen to have a very poor internet connection at your event, bringing the tablet and camera to a location with a strong internet connection after the event will send up all the images at that time! Paired to the data you scanned with it at the time of taking the image.

How Bruce H. Used GradPics Now to Increase Sales
Success Stories
April 21, 2022

How Bruce H. Used GradPics Now to Increase Sales

3
 minutes read
Bruce Heflin utilized Now Candid’s Grad Pics Now, with Selfie Check-In at a recent graduation, so far racking up roughly $2600 in total sales in less than two weeks.

Heflin had covered this Nursing College’s graduation in previous years, generating roughly $200 in sales each year. The sales had been so dismal the administrator would provide gas money to keep Bruce coming back. This year was a different story, Heflin has managed to increase his sales by roughly 1200% with the help of Grad Pics Now’s Selfie Check-In Workflow & automated marketing campaigns.

Here's How He Did It:

1. Used Selfie Check-In to collect correct & current contact data

2. Sent automated marketing messages during the event

3. Bruce had about $200 in sales by the time he reached home an hour or so after the event (he didn't have to go back to the office!)

4. He used a mix of GPN Price Levels 1 & 3

5. He had a total profit margin of roughly 75% across the College’s ceremonies after accounting for the 85% margin for digital downloads.

6. We’re excited to see people discovering the effectiveness of Now Candid’s systems in action when executed properly with quality photography!

We recently caught up with Bruce to get a better idea of how he started incorporating Now Candid's tools into his existing photography business. Watch the video below to hear from Bruce.

Let’s get in touch

If you’re a photographer looking to add NowCandid services to your wheelhouse – set up a call by clicking the button below.

How to customize formatting for each rich text

How to customize formatting for each rich text

How to customize formatting for each rich text

How to customize formatting for each rich text

How to customize formatting for each rich text

What’s a Rich Text element?

The rich text element allows you to create and format headings, paragraphs, blockquotes, images, and video all in one place instead of having to add and format them individually. Just double-click and easily create content.

A rich text element can be used with static or dynamic content. For static content, just drop it into any page and begin editing. For dynamic content, add a rich text field to any collection and then connect a rich text element to that field in the settings panel. Voila!

Headings, paragraphs, blockquotes, figures, images, and figure captions can all be styled after a class is added to the rich text element using the "When inside of" nested selector system.

  • List One
  • List Two
  • List Three
  • List Four
  • List Five

This is a link

This is bold text