HomeNavigation arrowBlogNavigation arrow
Current page
Feature Updates

Weekly Recap: Horizontal 3D Plaques, Event Calendar View & PhotoTag LiveLoop Links 📅🌀

Weekly Recap: Horizontal 3D Plaques, Event Calendar View & PhotoTag LiveLoop Links 📅🌀
Hey photo friends! 👋

Candy here! This week’s updates are big on visual workflows: more orientation options for our 3D products, a new Calendar view for Events, and PhotoTag-powered LiveLoop™ links for better slideshow control.

Let’s jump in!

🖼️ Big Product Upgrade: Horizontal Orientation for 3D Plaques & Prints

End customers now have more flexibility when ordering these 3D-rendered products:

🎓 Graduation Plaque now supports a new horizontal design

  • • 🔄 Customers can switch orientations during the live 3D render
  • • 🖼️ Updated 2D render support included as well

🪧 Premium Plaque now supports a horizontal design

  • 🔄 Orientation can be switched during the live 3D render

🖨️ Premium Print now supports a horizontal design

  • 🔄 Orientation can be switched during the live 3D render

✍️ Caption preview fix: Premium Print/Plaque now correctly reflect the default “Line 2” in the 3D render before a shopper enters their own text

These updates make it easier to sell premium products even when the “best” shot isn’t a perfect vertical crop.

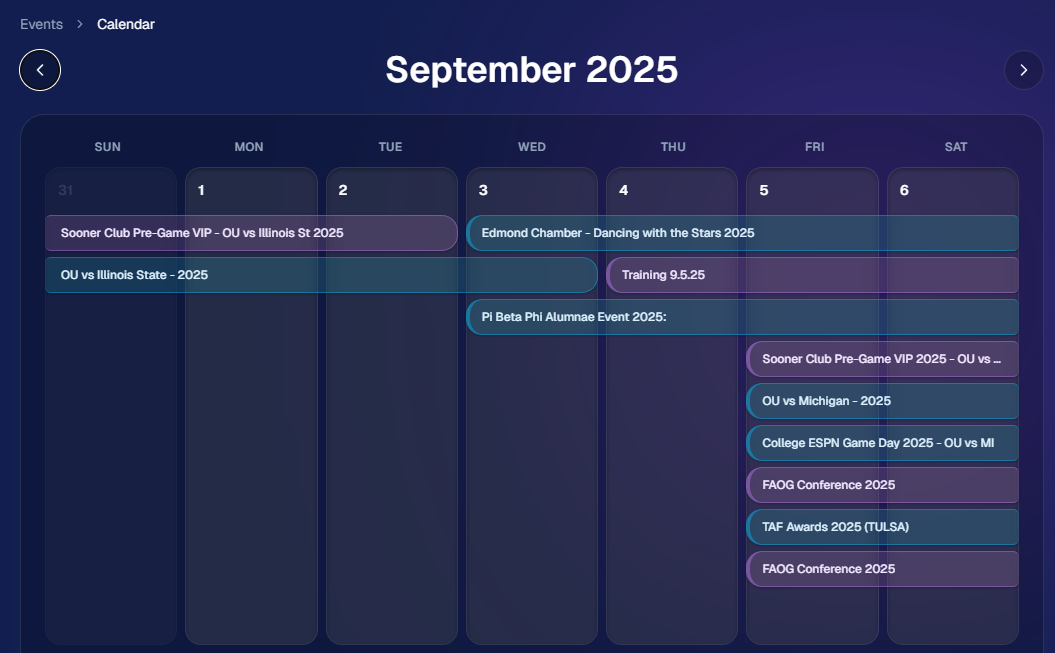
📅 New Dashboard Event Calendar View

Prefer a more visual way to plan and review your schedule?

🗓️ Event Calendar is now available via the calendar button on the Event List page

👀 Great for spotting what’s coming up at a glance, instead of scanning a long list

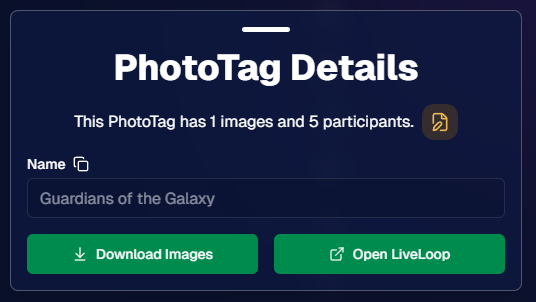
🌀 LiveLoop™: PhotoTag Links

LiveLoop™ just got more flexible:

🏷️ PhotoTags now have LiveLoop links

  • • Found in a couple places on the PhotoTag page in the Dashboard
  • • Pulls in new images automatically, just like a normal LiveLoop™

🧾 Cleaner titles & history

  • • LiveLoop page now shows the Event name in the title bar, history, and links
  • • PhotoTag links show as: PhotoTagName – EventName

Perfect for running separate slideshows per team, division, day, or group without juggling multiple Events.

🖥️ Dashboard Improvements

🧹 New “Clear” button in Manage Images select mode (clear selections without re-entering select mode)

📋 PhotoRoster uploads improved:

  • • 📞 Additional phone columns now ignore parentheses (like main phone)
  • • 🔀 Columns can be in any order (matching Event roster upload behavior)

🔗 Fixed Image Details lightbox link for images manually removed on Participant Details

🧾 Positive ID Code PDF sorting updated:

  • • A–Z participants with no PhotoTag
  • • Then PhotoTags A–Z (participants A–Z inside each)
  • • Then blank cards at the end

🛍️ Retail & Check-In Updates

🚫 Invisible Events are now truly inaccessible

  • • If an Event is marked invisible, its retail site + check-in pages now show an “Event is no longer available” screen

🌎 Positive ID check-in phone formatting helper

  • • If an existing registration code has a phone without “+”, we’ll append “+1” to default to US country format (unless it already starts with “+” for another country)

🧩 Fixed a retail site crash when the Statuette Ornament was included in a package

🛡️ iPhone GalleryGuard now loads faster

🛠️ Misc Fixes & Improvements

🖨️ Backprinting updates for existing Events when your business info is updated (previously it was locked to whatever info existed when the Event was created)

✉️ Fixed a strange edge case where email-only participants wouldn’t send if another email in the queue contained “.@”

✅ Improved email validation across all web check-ins

That’s the week!

Between horizontal premium product designs, PhotoTag-level LiveLoops™, and a Calendar view for Events, you’ve got a lot more control over how things look and how you run the day. 💫

Keep creating magic,

Candy 🍬

Related articles

How One Night Led to $15,000 in Social Photography Sales
Success Stories
December 12, 2022

How One Night Led to $15,000 in Social Photography Sales

9
 minutes read

Amy Lombardo, and her photography group recently sent several photographers to a military ball and at the time of writing this article, had over $15,000 in sales! To accomplish this, Amy used Now Candid’s Party Pics Now program & Tap A Face workflow with 4 photographers at the event. Several of these photographers worked photo stations with backdrops Amy provided (gray backgrounds with flags bordering the background) while other photographers roamed the party taking posed photos of the guests.

$15,000 is a lot of sales for one social event already, but it is especially impressive when you consider the fact that this was Amy’s first Now Candid event.

Amy Lombardo had this advice for those considering using Now Candid for their next event: “Keep it simple and trust the process. … When planning my first Now Candid event, I was advised to not overcomplicate things and to not get hung up on some of the more minor details. Following through with how the system is intended to work turned out very well for us!”

Thanks for trusting the process Amy! We wish you many successful events to come. To see Amy’s entire video testimonial, click the play button below.

Scanner Identification Now Available in Our Microsoft Store App
Feature Updates
December 1, 2022

Scanner Identification Now Available in Our Microsoft Store App

7
 minutes read

We have a new update now available for the Now Candid Microsoft Store App! This update has several quality of life changes and logging improvements, but the main change is that Scanner Identification has finally been implemented!


Scanner Identification is a system that positively IDs images to your customers using, as the name implies, a scanner to scan a customer’s QR card.


When setting up your event you can generate these QR cards (more on that later) that your customers can scan with their phone to input their contact information. From there, the info & QR code are linked. Any time a QR code is scanned by the photographer that starts a session, and all subsequent photos taken will be matched to that contact info until another QR code is scanned.


At this time, Scanner Identification will only be usable with Sports Pics Now and Portraits Now. During event creation, when one of those two programs have been selected, you’ll choose either the “Tap A Face & Selfie Registration” option, or the “Scanner Identification” option. Once Scanner Identification has been selected and the event created, you’ll be able to input how many QR cards you need and a PDF will be generated with that many cards.


You’ll want to print out the PDF on perforated paper such as this 4 up card paper found on Amazon to more easily distribute cards without manually cutting all the paper.


The Scanner Identification workflow does require an LTE tablet! It’s required both as a device to connect your scanner to and as a way to upload your images live at the event so that guests can have links to buy their images moments after their session ends! Since facial recognition is not being used, galleries will be sent even more quickly and with 100% of the images taken during the session.


If you happen to have a very poor internet connection at your event, bringing the tablet and camera to a location with a strong internet connection after the event will send up all the images at that time! Paired to the data you scanned with it at the time of taking the image.

How Bruce H. Used GradPics Now to Increase Sales
Success Stories
April 21, 2022

How Bruce H. Used GradPics Now to Increase Sales

3
 minutes read
Bruce Heflin utilized Now Candid’s Grad Pics Now, with Selfie Check-In at a recent graduation, so far racking up roughly $2600 in total sales in less than two weeks.

Heflin had covered this Nursing College’s graduation in previous years, generating roughly $200 in sales each year. The sales had been so dismal the administrator would provide gas money to keep Bruce coming back. This year was a different story, Heflin has managed to increase his sales by roughly 1200% with the help of Grad Pics Now’s Selfie Check-In Workflow & automated marketing campaigns.

Here's How He Did It:

1. Used Selfie Check-In to collect correct & current contact data

2. Sent automated marketing messages during the event

3. Bruce had about $200 in sales by the time he reached home an hour or so after the event (he didn't have to go back to the office!)

4. He used a mix of GPN Price Levels 1 & 3

5. He had a total profit margin of roughly 75% across the College’s ceremonies after accounting for the 85% margin for digital downloads.

6. We’re excited to see people discovering the effectiveness of Now Candid’s systems in action when executed properly with quality photography!

We recently caught up with Bruce to get a better idea of how he started incorporating Now Candid's tools into his existing photography business. Watch the video below to hear from Bruce.

Let’s get in touch

If you’re a photographer looking to add NowCandid services to your wheelhouse – set up a call by clicking the button below.

How to customize formatting for each rich text

How to customize formatting for each rich text

How to customize formatting for each rich text

How to customize formatting for each rich text

How to customize formatting for each rich text

What’s a Rich Text element?

The rich text element allows you to create and format headings, paragraphs, blockquotes, images, and video all in one place instead of having to add and format them individually. Just double-click and easily create content.

A rich text element can be used with static or dynamic content. For static content, just drop it into any page and begin editing. For dynamic content, add a rich text field to any collection and then connect a rich text element to that field in the settings panel. Voila!

Headings, paragraphs, blockquotes, figures, images, and figure captions can all be styled after a class is added to the rich text element using the "When inside of" nested selector system.

  • List One
  • List Two
  • List Three
  • List Four
  • List Five

This is a link

This is bold text